Despliegue de una web usando hugo
Que es hugo
Hugo es un generador de sitios web estaticos en los cuales los posts se escriben con markdown. Se instala en local en la maquina en la que queramos trabajar y tras ejecutarse nos crea un website estatico dentro de la carpeta public que luego moveremos a nuestro webserver preferido, en nuestro caso apache.
Instalacion de hugo
En el caso de debian, viene en repositorios y valdría con instalarlo con apt lanzando apt install hugo pero nos instala una version relativamente antigua que tendrá muy probablemente problemas de compatibilidad con temas que queramos instalarle. En el GitHub del proyecto tenemos paquetes de las ultimas releases para varias distribuciones. He instalado la 0.110.0 para debian descargando e instalando el paquete .deb desde ahi. Podemos comprobar que hugo ha sido instalado y averiguar nuestra versión lanzando un hugo version
root@webserver01:/# hugo version
hugo v0.110.0-e32a493b7826d02763c3b79623952e625402b168+extended linux/amd64 BuildDate=2023-01-17T12:16:09Z VendorInfo=gohugoio
Vale, tengo instalado hugo, ahora que
Bien, tras instalar hugo en nuestra maquina, lo siguiente que tenemos que hacer es posicionarnos en la raiz de donde queremos que se cree nuestro nuevo site y lanzar el comando para crearlo desde la propia consola. Aclarar que este path no tiene que ser el path donde la página será finalmente publicada, sino que es un path de nuestra máquina que necesita hugo para trabajar. Nos posicionamos en /hugo-sites/ (es el directorio de trabajo que he creado especificamente para trabajar con los sites creados con hugo) y lanzamos el comando hugo new site blog
root@webserver01:/hugo-sites# hugo new site prueba
Congratulations! Your new Hugo site is created in /hugo-sites/prueba.

Just a few more steps and you're ready to go:

1. Download a theme into the same-named folder.
   Choose a theme from https://themes.gohugo.io/ or
   create your own with the "hugo new theme <THEMENAME>" command.
2. Perhaps you want to add some content. You can add single files
   with "hugo new <SECTIONNAME>/<FILENAME>.<FORMAT>".
3. Start the built-in live server via "hugo server".

Visit https://gohugo.io/ for quickstart guide and full documentation.
Este comando nos crea todo lo necesario bajo el directorio /hugo-sites/prueba
root@webserver01:/hugo-sites# ls -la prueba/
total 44
drwxr-xr-x 10 root root 4096 Jan 30 13:49 .
drwxr-xr-x  5 root root 4096 Jan 30 13:49 ..
drwxr-xr-x  2 root root 4096 Jan 30 13:49 archetypes
drwxr-xr-x  2 root root 4096 Jan 30 13:49 assets
-rw-r--r--  1 root root   82 Jan 30 13:49 config.toml
drwxr-xr-x  2 root root 4096 Jan 30 13:49 content
drwxr-xr-x  2 root root 4096 Jan 30 13:49 data
drwxr-xr-x  2 root root 4096 Jan 30 13:49 layouts
drwxr-xr-x  2 root root 4096 Jan 30 13:49 public
drwxr-xr-x  2 root root 4096 Jan 30 13:49 static
drwxr-xr-x  2 root root 4096 Jan 30 13:49 themes
Tengo mi sitio, ahora quiero instalar un tema
Tras crear el sitio, lo siguiente que necesitamos es instalar un tema, vamos a poner como ejemplo el tema hello friend que es el que he usado para el blog. He optado por instalarlo como un submódulo, tengo pendiente estudiar bien las diferencias entre instalarlo de una u otra manera. Yo he optado por esta forma ya que es la que recomiendan en la documentacion oficial, aunque ahi usan otro tema. Los pasos son los mismos. Primero hay que inicializar un repositorio de git en la raiz de nuestro nuevo site, para esto lanzamos un git init
root@webserver01:/hugo-sites/prueba# git init
hint: Using 'master' as the name for the initial branch. This default branch name
hint: is subject to change. To configure the initial branch name to use in all
hint: of your new repositories, which will suppress this warning, call:
hint:
hint:  git config --global init.defaultBranch <name>
hint:
hint: Names commonly chosen instead of 'master' are 'main', 'trunk' and
hint: 'development'. The just-created branch can be renamed via this command:
hint:
hint:  git branch -m <name>
Initialized empty Git repository in /hugo-sites/prueba/.git/
Tras esto instalamos el tema como un submodulo con el comando git submodule add -f https://github.com/panr/hugo-theme-hello-friend.git themes/hello-friend
root@webserver01:/hugo-sites/prueba# git submodule add -f https://github.com/panr/hugo-theme-hello-friend.git themes/hello-friend
Cloning into '/hugo-sites/prueba/themes/hello-friend'...
remote: Enumerating objects: 2143, done.
remote: Counting objects: 100% (6/6), done.
remote: Compressing objects: 100% (6/6), done.
remote: Total 2143 (delta 0), reused 2 (delta 0), pack-reused 2137
Receiving objects: 100% (2143/2143), 10.51 MiB | 12.69 MiB/s, done.
Resolving deltas: 100% (1094/1094), done.
Estupendo, tengo un tema, vamos a activarlo y a configurar mi sitio
Bien, tenemos el tema descargado e instalado en nuestro nuevo site. Vamos a activarlo y a modificar algunas de las primeras cosas que podemos tocar. El archivo principal de configuracion del site es el archivo config.toml que hay en la raiz del directorio de trabajo del mismo. Por defecto viene asi:
baseURL = 'http://example.org/'
languageCode = 'en-us'
title = 'My New Hugo Site'
Personalmente, y por todo lo que lo toco tanto con ansible como con home assistant me apaño mas con yaml, y hugo tambien lo soporta. Asi que voy a borrar por completo el config.toml y voy a crear un config.yaml. El config.yaml de ejemplo quedaria así:
baseURL: http://example.org/
languageCode: en-us
title: My New Hugo Site
Tendremos que modificarlo para que use el tema que hemos descargado y ya de paso vamos a personalizar nuestro sitio. Revisando la documentacion del tema tiene que quedar asi:
baseUrl: /
languageCode: en-us
theme: hello-friend
copyright: ''
paginate: 5

params:
  # dir name of your blog content (default is `content/posts`)
  contentTypeName: posts
  # "dark" or "light"
  defaultTheme: dark
  # if you set this to 0, only submenu trigger will be visible
  showMenuItems: 2

languages:
  en:
    title: Your site title
    subtitle: Your site subtitle
    keywords: ''
    menuMore: Show more
    writtenBy: Written by
    readMore: Read more
    readOtherPosts: Read other posts
    newerPosts: Newer posts
    olderPosts: Older posts
    dateFormatSingle: 2006-01-02
    dateFormatList: 2006-01-02

    params:
      logo:
        logoText: hello friend
        logoHomeLink: /
    #   or
    #
    #   path: /img/your-example-logo.svg
    #   alt: Your example logo alt text

    menu:
      main:
      - identifier: about
        name: About
        url: /about
      - identifier: showcase
        name: Showcase
        url: /showcase
¿Y ahora que?
Ahora si que si, tenemos nuestro sitio listo para correr. Una gran ventaja que tiene hugo es que tiene su propio servidor web para pruebas. Vamos a ver si levanta el sitio con la configuracion por defecto, sin entradas ni nada. Para ello lanzamos el comando hugo server --bind=10.101.0.140
root@webserver01:/hugo-sites/prueba# hugo server --bind=10.101.0.140
Start building sites …
hugo v0.110.0-e32a493b7826d02763c3b79623952e625402b168+extended linux/amd64 BuildDate=2023-01-17T12:16:09Z VendorInfo=gohugoio

                   | EN
-------------------+-----
  Pages            |  7
  Paginator pages  |  0
  Non-page files   |  0
  Static files     |  3
  Processed images |  0
  Aliases          |  1
  Sitemaps         |  1
  Cleaned          |  0

Built in 51 ms
Watching for changes in /hugo-sites/prueba/{archetypes,assets,content,data,layouts,static,themes}
Watching for config changes in /hugo-sites/prueba/config.yaml, /hugo-sites/prueba/themes/hello-friend/config.toml
Environment: "development"
Serving pages from memory
Running in Fast Render Mode. For full rebuilds on change: hugo server --disableFastRender
Web Server is available at //localhost:1313/ (bind address 10.101.0.140)
Press Ctrl+C to stop
Le he pasado el parametro bind address para que escuche por la ip 10.101.0.140, si no solo escucha por localhost y al no tener gui la maquina donde estamos creando los sites no podremos abrirla. El servidor se levanta en el puerto 1313.
Funciona, quiero escribir alguna entrada
Tenemos la web funcionando en local, así que ahora vamos a crear una entrada para ver que todo está OK. Escribimos el comando hugo new posts/hello-world.md
root@webserver01:/hugo-sites/prueba# hugo new posts/hello-world.md
Content "/hugo-sites/prueba/content/posts/hello-world.md" created
El contenido por defecto de la entrada es el siguiente:
---
title: "Hello World"
date: 2023-01-30T14:17:16+01:00
draft: true
---
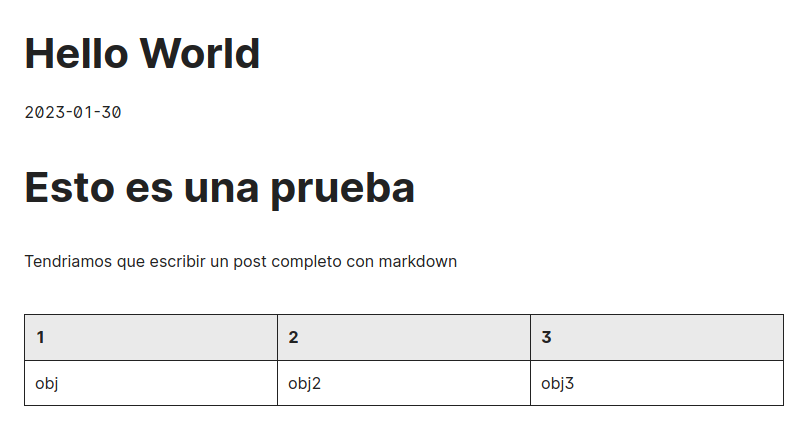
Escribimos el contenido del post en formato markdown debajo de los guiones que delimitan el final del encabezado, pero vamos a mantener la linea que dice draft: true por el momento. Nos queda algo asi:
---
title: "Hello World"
date: 2023-01-30T14:17:16+01:00
draft: true
---
# Esto es una prueba

Tendriamos que escribir un post completo con markdown

| 1 | 2 | 3 |
|---|---|---|
| obj | obj2 | obj3 |
Cuando terminemos, y antes de eliminar la linea que establece que el post es un borrador aun, podemos lanzar el servidor local en modo debug con el comando hugo server -D --bind=10.101.0.140, este comando nos mostrará los borradores como si hubiesen sido publicados:
root@webserver01:/hugo-sites/prueba# hugo server -D --bind=10.101.0.140
Start building sites …
hugo v0.110.0-e32a493b7826d02763c3b79623952e625402b168+extended linux/amd64 BuildDate=2023-01-17T12:16:09Z VendorInfo=gohugoio

                   | EN
-------------------+-----
  Pages            | 10
  Paginator pages  |  0
  Non-page files   |  0
  Static files     |  3
  Processed images |  0
  Aliases          |  2
  Sitemaps         |  1
  Cleaned          |  0

Built in 52 ms
Watching for changes in /hugo-sites/prueba/{archetypes,assets,content,data,layouts,static,themes}
Watching for config changes in /hugo-sites/prueba/config.yaml, /hugo-sites/prueba/themes/hello-friend/config.toml
Environment: "development"
Serving pages from memory
Running in Fast Render Mode. For full rebuilds on change: hugo server --disableFastRender
Web Server is available at //localhost:1313/ (bind address 10.101.0.140)
Press Ctrl+C to stop
Nuestra entrada:
Perfecto, vamos a publicarlo todo
Tenemos hecha nuestra prueba en local, nos queda la parte de desplegar nuestro sitio. Para ello lanzamos el comando hugo en la raiz de nuestro site:
root@webserver01:/hugo-sites/prueba# hugo
Start building sites …
hugo v0.110.0-e32a493b7826d02763c3b79623952e625402b168+extended linux/amd64 BuildDate=2023-01-17T12:16:09Z VendorInfo=gohugoio

                   | EN
-------------------+-----
  Pages            |  7
  Paginator pages  |  0
  Non-page files   |  0
  Static files     |  3
  Processed images |  0
  Aliases          |  1
  Sitemaps         |  1
  Cleaned          |  0

Total in 62 ms
Comprobamos que nos ha generado todo lo necesario en el directorio /hugo-sites/prueba/public:
root@webserver01:/hugo-sites/prueba# ls -la public/
total 232
drwxr-xr-x  8 root root   4096 Jan 30 14:28 .
drwxr-xr-x 12 root root   4096 Jan 30 14:06 ..
-rw-r--r--  1 root root   4622 Jan 30 14:28 404.html
-rw-r--r--  1 root root 179846 Jan 30 14:28 bundle.min.js
drwxr-xr-x  2 root root   4096 Jan 30 14:28 categories
drwxr-xr-x  2 root root   4096 Jan 30 14:28 css
drwxr-xr-x  2 root root   4096 Jan 30 14:28 fonts
drwxr-xr-x  2 root root   4096 Jan 30 13:58 img
-rw-r--r--  1 root root   4649 Jan 30 14:28 index.html
-rw-r--r--  1 root root    444 Jan 30 14:28 index.xml
drwxr-xr-x  3 root root   4096 Jan 30 14:28 page
-rw-r--r--  1 root root    284 Jan 30 14:28 sitemap.xml
-rw-r--r--  1 root root      0 Jan 30 13:58 style.css
drwxr-xr-x  2 root root   4096 Jan 30 14:28 tags
Tan solo nos queda copiarlo a la raiz de nuestro vhost de apache que habremos configurado previamente y ya tenemos nuestro sitio desplegado con hugo y nuestra primera entrada escrita.
Yo ahora mismo lo estoy haciendo con rsync, para lo cual he creado un “script” por llamarlo de alguna manera. Lo he llamado deploy.sh:
#!/bin/bash

rsync -avz --delete public/ /var/www/blog.jorgediez.com/

exit 0
Ejemplo de salida:
root@webserver01:/hugo-sites/blog# ./deploy.sh
sending incremental file list
deleting .htaccess
./
404.html
bundle.min.js
index.html
index.xml
sitemap.xml
categories/
categories/index.html
categories/index.xml
css/
css/style.css
fonts/
fonts/Inter-Bold.woff2
fonts/Inter-BoldItalic.woff2
fonts/Inter-Italic.woff2
fonts/Inter-Medium.woff2
fonts/Inter-MediumItalic.woff2
fonts/Inter-Regular.woff2
page/
page/1/
page/1/index.html
posts/
posts/index.html
posts/index.xml
posts/hello-world/
posts/hello-world/index.html
posts/hugo-creando-web/
posts/hugo-creando-web/index.html
posts/page/
posts/page/1/
posts/page/1/index.html
tags/
tags/index.html
tags/index.xml
tags/homelab/
tags/homelab/index.html
tags/homelab/index.xml
tags/homelab/page/
tags/homelab/page/1/
tags/homelab/page/1/index.html
tags/linux/
tags/linux/index.html
tags/linux/index.xml
tags/linux/page/
tags/linux/page/1/
tags/linux/page/1/index.html
tags/self-hosting/
tags/self-hosting/index.html
tags/self-hosting/index.xml
tags/self-hosting/page/
tags/self-hosting/page/1/
tags/self-hosting/page/1/index.html

sent 734,907 bytes  received 711 bytes  1,471,236.00 bytes/sec
total size is 992,974  speedup is 1.35
Ojo, he tenido que tener el .htaccess dentro del directorio public para que no se lo cepille cada vez que se realiza un nuevo deploy.
Comentarios